Chapter · source pages 29–40
How to Test, Setup, and Use Bands
This manual provides guidance on setting up resistance bands for various barbell exercises, along with visual references to help with optimizing the setup. The variations in this manual are tried and true. Theyve been us...
How to Test, Setup, and Use Bands
Jesse Bifano
Overview
This manual provides guidance on setting up resistance bands for various barbell exercises, along with visual references to help with optimizing the setup. The variations in this manual are tried and true. Theyve been used successfully all over the world by athletes of all levels for many years. While exact band tension is less critical to your progress, maintaining consistency in your setup is essential for tracking and improving your performance over time. Remember, there’s a learning curve. At first, the setup process may feel cumberson, but you’ll soon find that most setups will follow a similar routine.
Key Points
- Focus on consistency, not exact tension: Band resistance can vary due to multiple factors such as how they’re set up, height or bone segment length of the athlete, the bar they’re being used on, box or bench height, manufacturer, age, or number of uses. Aim for a consistent setup rather than precise tension measurement. This consistency will allow you to track and beat personal records (PRs) effectively.
- Track your results: This practice allows you to see your progress over time and break records. For PRs, such as a 1-rep max (1RM) in exercises like box squats, deadlifts, or bench press, record each attempt with a specific band setup. For example:
A. Note the lift: Box Squat: 1RM+#4 bands
B. Record all 7 lifts building up to your max
- Box Squat: 215-255-290-320-345-365-385+#4.
- If you missed the last lift it would look like this
- Box Squat: 215-255-290-320-345-365-/385+#4
C. This becomes valuable information that we’ll use to build our plans in the future “1RM box squat (#1 bands)” or “1RM deadlift (#2 bands).”
D. Separate from your daily training keep two lists. One for your all time PRs in each lift broken down by category (squats, presses, deadlifts) and the second of all your most recent plans for squats, presses, deadlifts. We use a logbook that holds a year of data. On the back page (by category) is every plan used to build to a 1RM for that year.
- Dynamic effort days: Use the appropriate band resistance and weight to ensure you’re in the ideal percentage range to achieve a bar velocity between 0.7 and 0.9 m/s. Adding either too much band or too much plate weight will slow the athlete down and move into a zone where the weight is too heavy to improve speed-strength but too light to improve absolute strength. Be humble and prioritize movement quality and velocity. Your trained response will become your dominant response and how you move will be where you build strength.
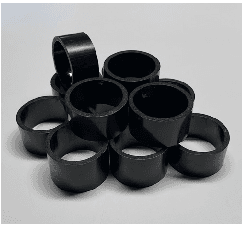
Band Identification
It’s important to create consistent verbiage when using your bands to prevent communication breakdown. We prefer to refer to the band by the number, e.g. #3 bands (aka light or green). However, some people may prefer the name or color.
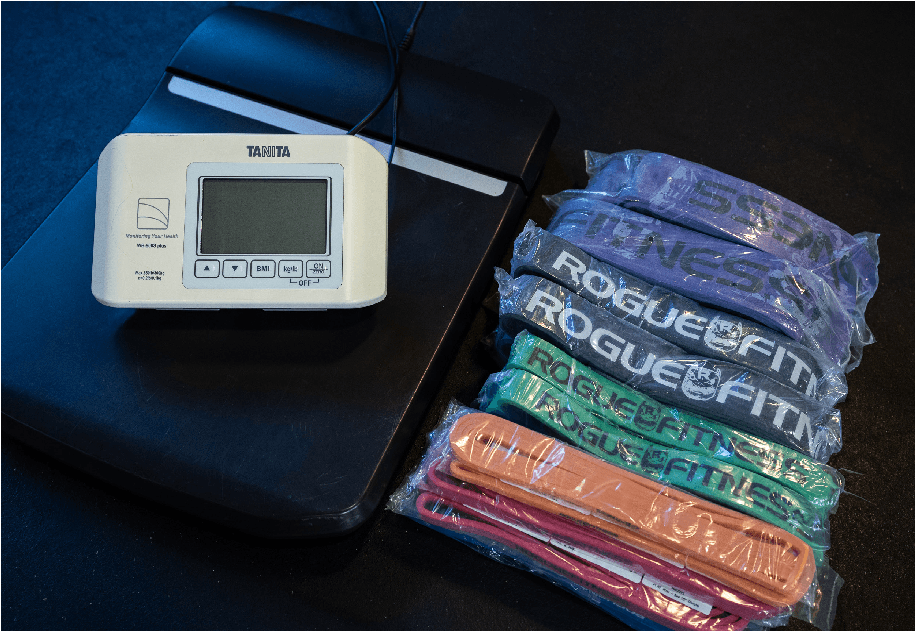
Band Identification Table
- #0: Micro, Orange.
- #1: Mini, Red.
- #2: Monster Mini, Blue.
- #3: Light, Green.
- #4: Average, Black.
- #5: Heavy, Purple.
Band Setup Practices
Test New Bands
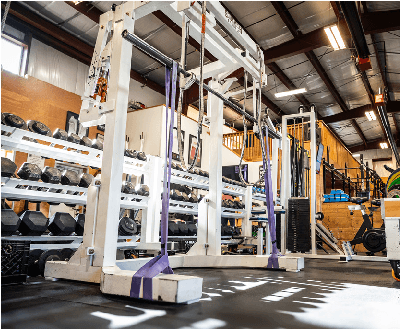
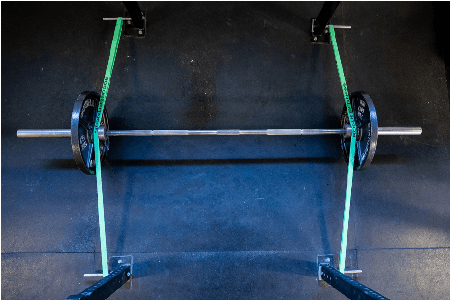
Test the resistance of your bands by hanging them from a pull-up rig. If the bands are equal in tension, the bar will be level to the floor. We recommend using only high-quality bands from a reputable company like Rogue Fitness.
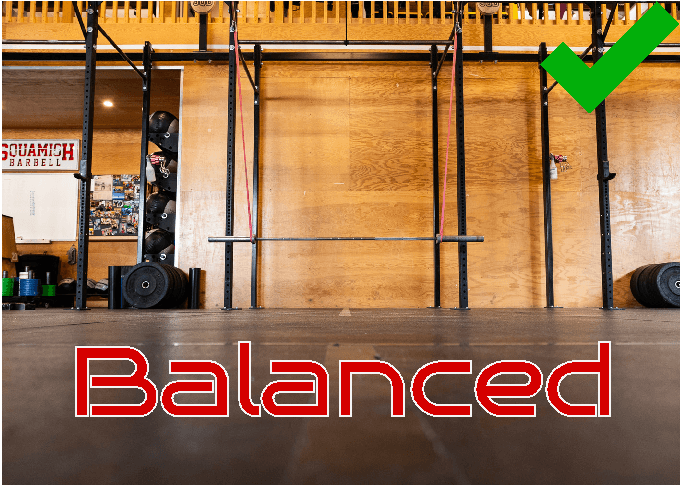
Balanced

Unbalanced
Band Setup Practices
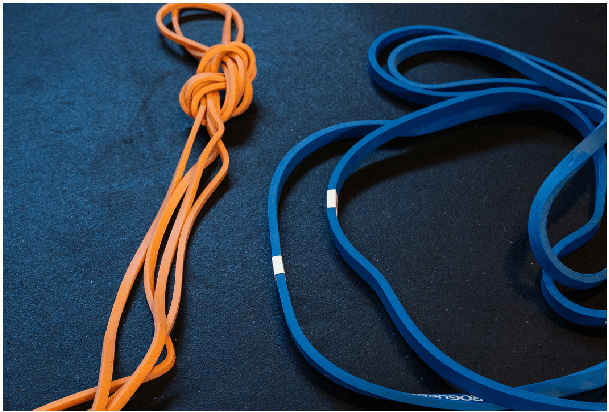
Keep Bands Organized and Separated
Store lifting bands separate from all “single” bands, and keep them in pairs by either tying them in a knot or marking them with electrical tape (we use different colours when we have multiple sets of the same band). This organization will help identify these bands as “only used in pairs”. When the bands begin to show significant wear, or damage that compromise the integrity of the band, then it’s time to replace them. Cut and dispose of the damaged band and retire its partner to “general use.”
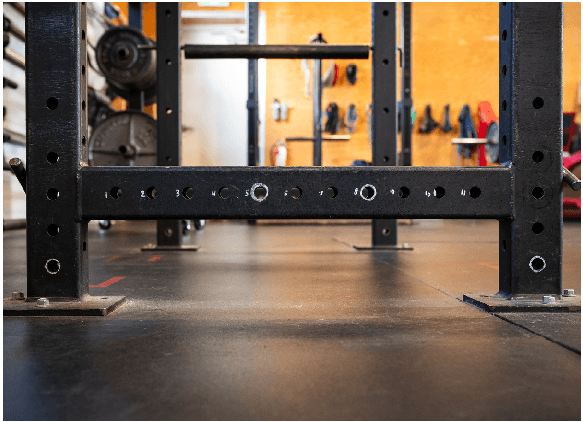
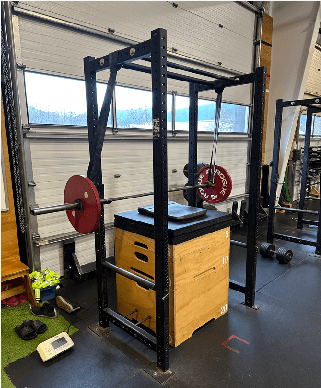
Mark Pin Locations on Rack
If you’re using a rack, it’s helpful to mark your pin positions for each exercise. Use tape or a paint pen (as shown) to circle the corresponding holes. Different colors can denote setups for different exercises, such as marking one color for deadlift pin positions and another for bench press. In this photo the rack is marked for both bench press and deadlift.
Band Setup Practices
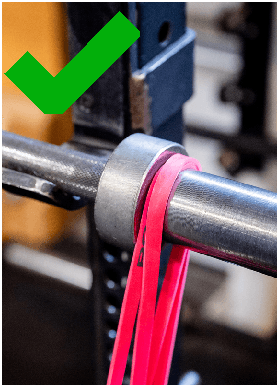
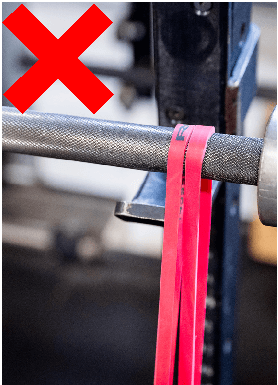
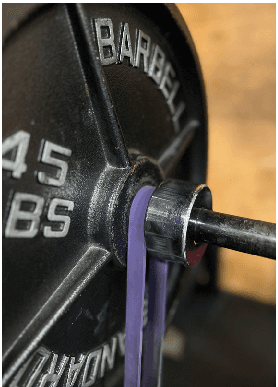
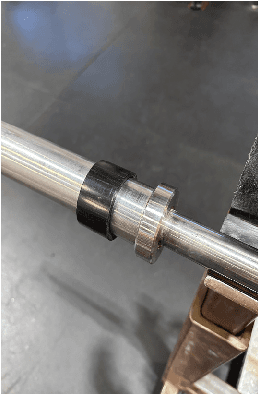
Place Bands on Sleeves
Apply the bands to the barbell by placing them on the sleeve. This ensures the bands won’t block the athlete from re-racking (this can happen when the band is applied to the barbell’s shaft). A bushing, or bearing bar, will allow the bands to “auto adjust” a little in the case of uneven tension. In this setup, the plates can still rotate freely, allowing for better barbell control and minimizing unnecessary strain. The plates (not shown) will be placed on the sleeve after the band. There are some specialty bar variations to this set up (see chapter 3).
Use ABS to Protect Bands (Optional)
If you would like to increase the protection of your bands you can but 2” ABS pipe and cut them in to 3/4”, 1-1/4”, 1-3/4” pieces.
Band Setup Practices
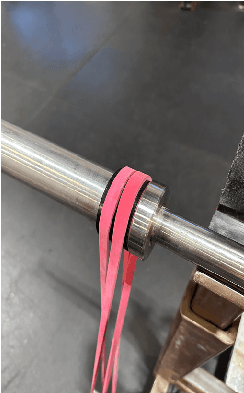
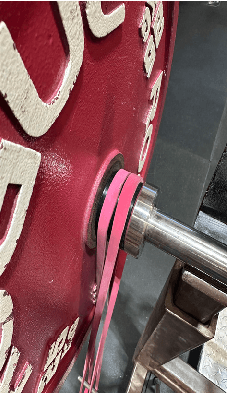
Evenly Distribute Bands on Pegs and Barbell
Make sure that the bands aren’t twisted and tension is evenly distributed. Uneven band tension from side to side is often easily corrected by adjusting the bands after they are placed on the sleeve.Always apply the bands before your warm up set so you can test for uneven loading. This can sometimes be as simple as unracking the bar as a side to side discrepancy it’s often very easy to feel. To fix this simply feed the band up and/or down on the side that’s tighter and retest. In some cases like bench or deadlift it might be a matter of taking the band off on the side with heavier tension and reapplying it. If it feels even on the unrack and even on your first empty bar warm up set you’re probably good to go.
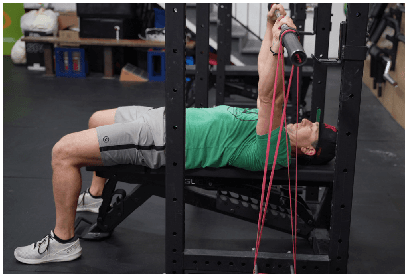
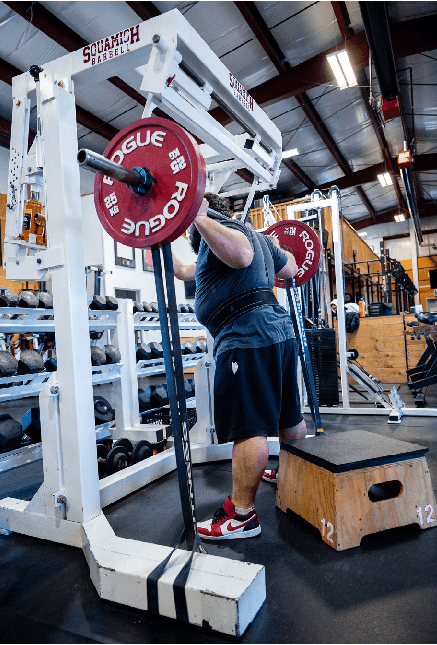
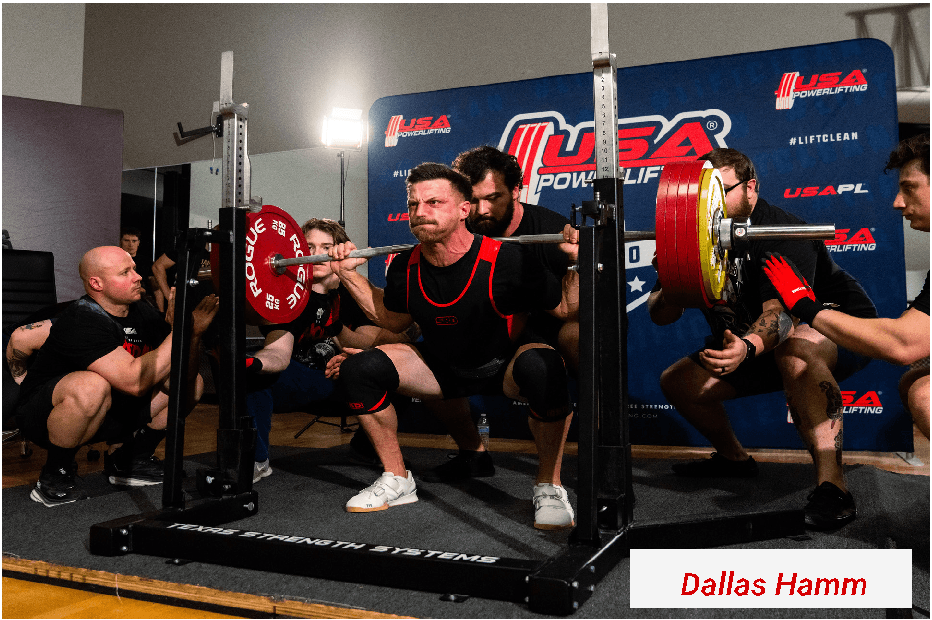
Bands Should Be in a Vertical Alignment
When the lifter is in the start position of the lift, the bands should be vertical (as viewed from the side) for a back squat, an isosceles triangle for bench, and centered in the span for the deadlift. In the case of a back squat being performed in the monolift they can be set up vertical when the bar is in the rack (as shown below), but in all other cases where an athlete will “walk out” the bar for their back squat the bands will need to be at an angle when the bar is set resting in the rack. The size of this angle will depend on the distance the athlete plans to walk out (remember, as long as you’re not going to hit the J-cups or rack on your ascent you do not need to be any further back from the rack if you’re using safety pins and spotters).
Band Setup Practices
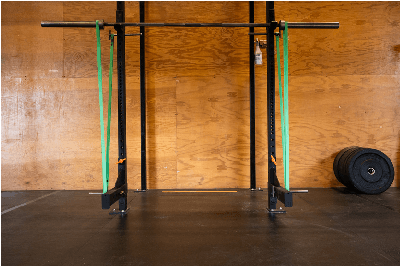
Keep Constant Band Tension Throughout Lift
It is important the bands maintain some tension throughout the entirety of the lift. An example of a bad set-up is where there is a complete loss of tension at the bottom of the lift and the band is loose or has slack. In the following photos, notice there is tension at the top and bottom. If the band has any sort of slack in the bottom, the setup must be adjusted.
This means, unlike chains, bands will still have a notable amount of tension load being applied to the bar at the bottom of the lift. See Master Band Tension Sheet in the appendix on page X to see loads at top, bottom and the difference.
Band Care and Maintenance
In more than a decade of using bands like this week in week out with a team of 30-50 athletes. I’ve seen bands fail only 1 or 2 times and never on a heavy lift. These guidelines below have come from the lessons we’ve learned. Here’s how to maximize safety:
- Don’t clean them with solvents or cleaning products.
- Store in a room temperature and dry place.
- Do not store or leave in direct sunlight.
- Inspect bands before and after every use, looking for damage, excessive wear and tear.
- If in doubt, retire the bands.
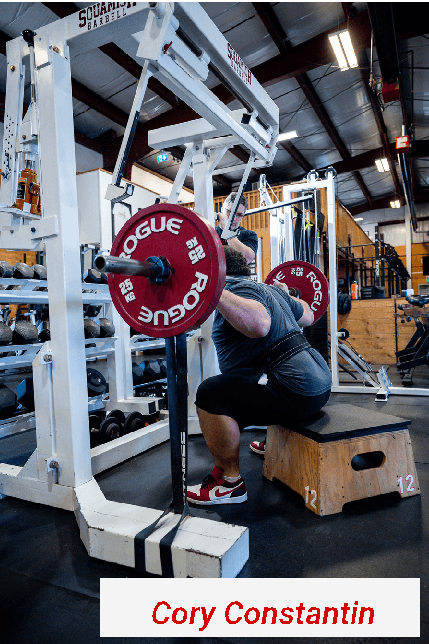
Cory Constantin
Calculate Band Tensions (Optional)
Option 1
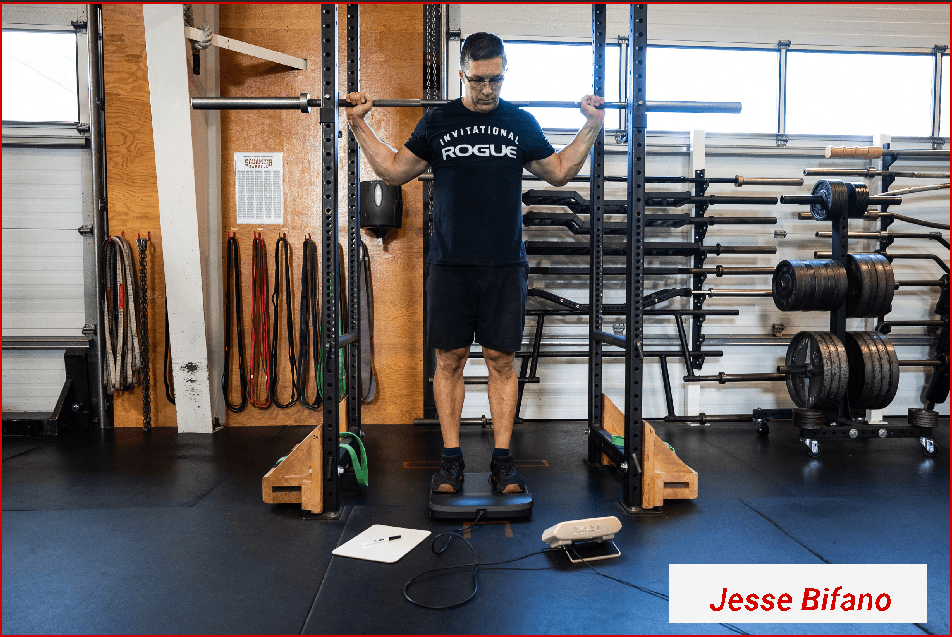
- Set up the bands as you would for the lift then stand on the scale. Just remember to account for the thickness of the scale by bending your knees.
Band Tension=(weight of bar +athlete+bands) - (weight of bar+athlete)
Option 2
- Measure the height off the floor of where the bar sits at lockout then create a platform at that height and place the scale on that. Don’t forget to account for the thickness of the scale on this one as well.
Band Tension=(weight of bar +bands) - (weight of bar)
Personalized Band Tensions (Optional)
Keep Constant Band Tension Throughout Lift
Band tension in this book is based on an athlete who is 5’10” (178cm) and the set ups shown. If your height varies more than +/-4” (10cm) off this height or you use a different set up than what is shown you may want to consider establishing your own band tension numbers. To figure out your own numbers use one of the following options.
The scale: Accuracy really counts here. Use the highest quality scale you can get your hands on. The scale required to do this will also need to have a max load above the heaviest bands you plan to test + the weight of the athlete + the weight of the bar. In some cases this may be upwards of 500#. Option 2 will not require as heavy a scale as there’s no athlete involved.
Option 1
This is the best, and easiest, for the squat and deadlift:
- Add the weight of the bar to the weight of the athlete (make sure that during this process you don’t take off a hoodie or change your shoes as it will affect your numbers).
- Set up the scale directly under the bar.
- Get on the scale with the bar in the position it would be in for the lift. Remember to account for the thickness of the scale.
- Band tension percentages are based on the top or finish position of the lift. But if you’re keen and can do this safely you can also squat down for a bottom tension, or in the case of the deadlift hold the bar in the start position.
Example:
Athlete + barbell = 265
Athlete + barbell + bands = 370
Band tension = 105
Notes:
- If you have a partner it does help setting up your proper start position and bottom position and then measuring the bar height off the floor so you can more accurately get those heights right when you’re on the scale.
- Don’t go over the top on this and stress about a pound or two. Bands will age and there are many factors that can and will cause these numbers to vary.
Personalized Band Tensions (Optional)
Option 2
This is the better option for bench press and done with three people.
- Measure the height from the floor to the bottom of the barbell when the athlete is in the lockout or start position. Make sure stance (sumo, conventional, box squat or back squat), grip width (bench press), bar position on the back (in the case of the squat) and shoes are all the same as if you were actually lifting.
- Repeat this process if you also want numbers for the bottom position.
- Using boxes and rubber mating raise the scale to that height.
- Holding onto the ends of the bar raise it above the height of the scale and have someone slide the scale (on boxes) under the bar.
Example:
Barbell = 45
Barbell + bands = 125
Band tension = 80
Notes:
- This option is more accurate and safer than option 1, but is slower and more time consuming.
- It does not require as heavy a scale as option 1.
Dallas Hamm