Chapter · source pages 83–100
Appendix
\u201cSpecial Strength Development For All Sports\u201d by Louie Simmons
Appendix
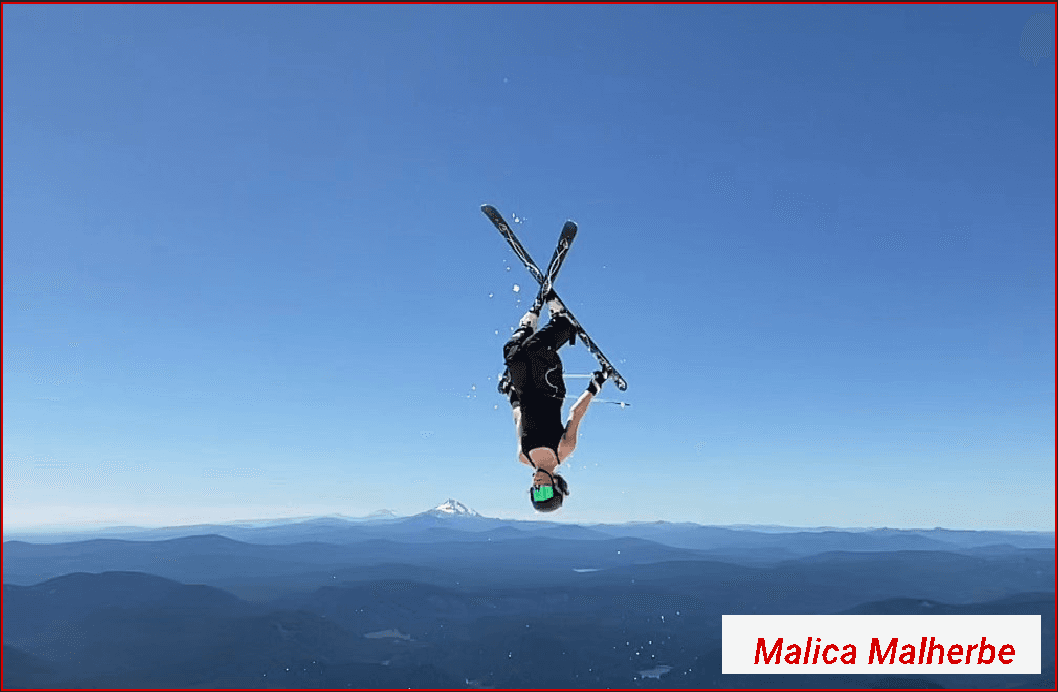
Malica Malherbe
Book Recommendations
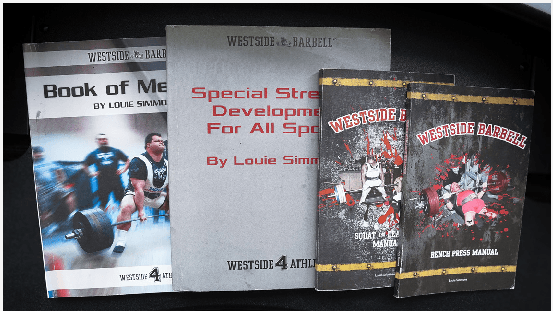
Louie Simmons/Westside Barbell
“Squat and Deadlift Manual” by Louie Simmons
“Bench Press Manual” by Louie Simmons
“Book of Methods” by Louie Simmons
“Special Strength Development For All Sports” by Louie Simmons
*this is in order of recommendation
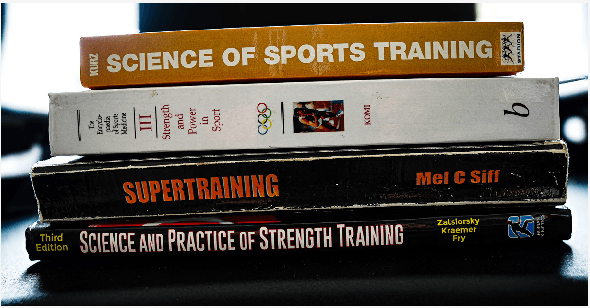
Exercise Science
“Science of Sports Training” by Thomas Kurtz
“Science and Practice of Strength Training” by Zatsiorsky, Kraemer, Fry
“Strength and Power in Sport” by P.V. Komi
“Supertraining” by Siff, Verkhoshansky
*this is in order of recommendation
Equipment Recommendations
R3 Rogue Rack
We highly recommend the R3 Rogue Rack. It takes up minimal space, has the Westside 1” spacing for bench press, is incredibly durable, great setup and tension for bands on the deadlift, and maximizes space for the bar (2” versus 3” square tube). Make sure if you use a rack with bands it’s bolted to the ground (this has run our athletes into trouble while travelling more than once).
RepOne Velocity Meter
RepOne (www. reponestrength.com). We use the RepOne to track our velocities on Dynamic Effort days. Use this removes all guess work, estimations, and debates. You can also use it to measure the bar travel (distance) in real time if you’re making changes to your movement like grip or stance width.
Other Important Equipment
- Specialty Bars (See Chapter 5)
- Rogue Glute-Hamstring Developer and/or Inverse Curl
- Rogue Reverse Hyper *with rollers and strap
- Rhino Belt Squat or Belt Squat Machine
- Squamish Blocks
- 1,2,3,4, and 5 boards *for bench press and accessory work
- Rubber mats * for adjusting box heights for squatting, deficit deadlifts, and block pulls
- 2” blocks * foot blocks for bench press, adjusting box heights for squats, deficit deadlifts, and block pulls
Do It Yourself

If you or a friend have the skills, a couple hours, and some simple supplies, you can really expand the number of options for both primary and accessory work as well as improve the speed and ease of set ups. For example, by building a 2 board you add:
Example: New Exercises By Building a 2-Board Bench Press Block
- 2-board Bench Press: 1RM (grips: best, close, wide).
- 2-board Bench Press: 1RM (bands).
- 2-board Bench Press: 1RM (chains).
- 2-board Bench Press: 1RM (bands + chains).
- Finisher: 2 board close grip bench press: 20-20-20.
- Finisher: 2 board push-ups: 3xRM OT4min. *no pause, no rest.
This list gets longer by also building a 1, 3, 4, and 5 board (though we only use 4 and 5 boards for accessory work).
In the following pages you’ll find dimensions for the equipment we’ve been using for more than 10 years.
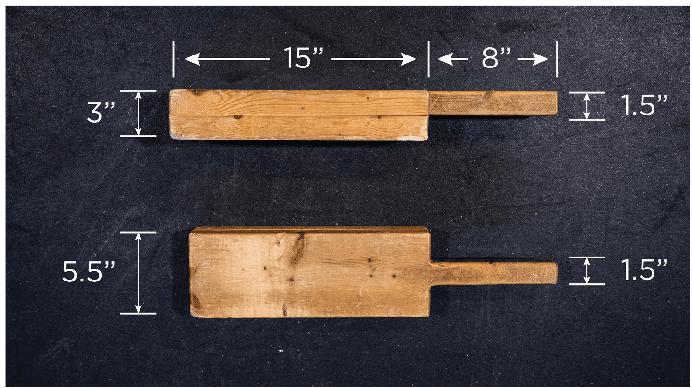
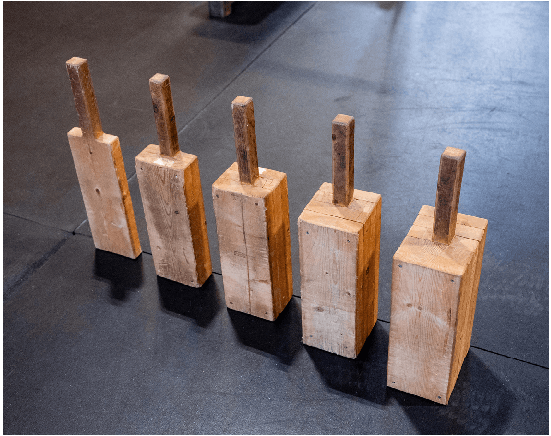
How to Build Boards (1-, 2-, 3-, 4- and 5)
Directions
- Cut a 2x6” board 23” long.
- Mark out the handle. 8” in length 2” from each side and 1.5” wide. Mark lines only where you plan to cut.
- Cut the handle using a jigsaw or handsaw. This creates a 1-board or the handled board for your 2, 3, 4, or 5 board.
- To make 2, 3, 4, or 5 boards cut 2x6” boards in 15” lengths. A 2 board needs 1 added, a 3 board needs 2 added, etc.
- Screw the 15” boards to the handled board using 2” - 2 ¼” GRK screws.
- Finish the edges using a router with a ¼” roundover. This can also be done with a sanding block.
- Sand with 180 grit sandpaper and finish with 3 coats of Varathane (if you’re real keen).
Tools
- Tape measure.
- Carpenters square.
- Pencil.
- Circular saw.
- Jig saw or hand saw.
- Impact driver or drill + bit for GRK screws.
- Router with a ¼” roundover bit or sanding block.
- 180 grit sandpaper.
Materials
- 2x6.
- 1 board: 24”.
- 2 board: 39”.
- 3 board: 54”.
- 4 board: 69”.
- 5 board: 85”.
- Full set: 3x8’ (2x6).
- 2” or 2-¼” GRK screws.
*if laid out correctly
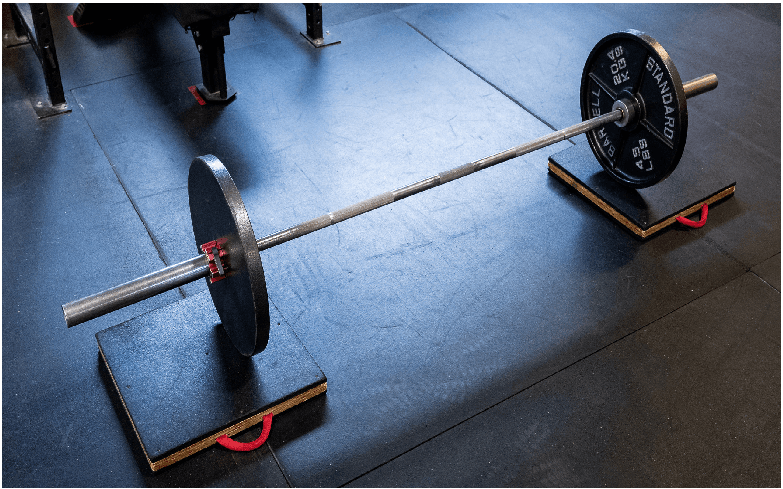
1/2” Rubber Mats
1/2” stall mats cut to the size of the top of your boxes provide a lot of versatility. These can be used to very accurately set your box height as shown here, to elevate feet on a bench press, elevate the bar for block pull deadlifts, stand on for deficit deadlifts, or to finely adjusting box height for box jumps (great when doing single leg box jump work or building up to a max).
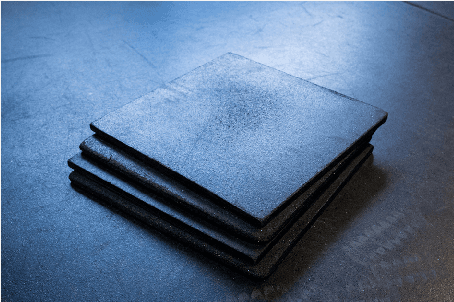
These mats are cut to 18” x 18”, which is the size of the top of our boxes.
2” Blocks
2” blocks are built by combining two 1/2” pieces of plywood, which are sandwiched between two 1/2” rubber mats, with a handle masterfully attached. Ours are 18”x18” to match the tops of our plyo boxes and make them more broadly useful. The handle is a piece of 1” tubular webbing with a shorter piece of 10.5mm cord inside of it.
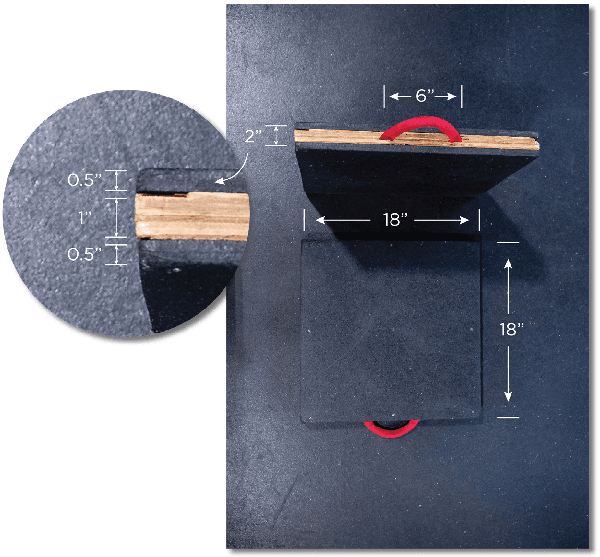
How to Build 2” Blocks
Directions
- Cut 2 pieces of ½” plywood and 2 pieces of rubber stall mat to 18”x18” or the dimensions of the top of your plyo boxes.
- In 1 piece of plywood you need to use either a router or a chisel to created 2 channels (1 for each end of the webbing. Each channel is 1” wide, 1.5” long, and ⅛” deep. The channels are 6” in from sides of the plywood and the space between the channels is 4”.
- Cut a 10” length of tubular webbing and a 6” length of 10.5mm climbing cord.
- Slide the climbing cord into the center of the tubular webbing. This gives the handle a nicer feel and grip.
- Place the ends of the webbing into the channels and staple them into place. This should sit very flat.
- Using carpenters glue glue the 2 pieces of plywood together.
- Using 3M spray adhesive glue the rubber stall mats to the plywood.
- Using 1.5” GRK screws, screw the rubber mats to the plywood. Off set the screw pattern on the second side to avoid them from hitting the screws from the first side.
- Enjoy your world class 2” blocks.
Tools
- Knife (for cutting rubber and webbing).
- Straight edge (for knife for cutting rubber).
- Tape measure.
- Carpenters square.
- Pencil.
- Table saw or circular saw and fence (for cutting plywood).
- Lighter (for melting ends of webbing and cord).
- Impact driver or drill + bit for GRK screws.
- Router with a upcut spiral bit or a handle chisel.
Materials (per set)
- 4x 18”x18”x1/2” rubber stall mat.
- 4x 18”x18”x1/2” plywood (best bought as a 48”x48” sheet).
- 1 meter of tubular webbing (this is usually the smallest amount you can buy).
- 1 meter of 10.5mm climbing cord (this is usually the smallest amount you can buy).
- Carpenters glue.
- 3M spray adhesive.
- 1.5” GRK screws.
It’s nice to have 2 sets of these (which will mean doubling this supply list (not climbing cord)
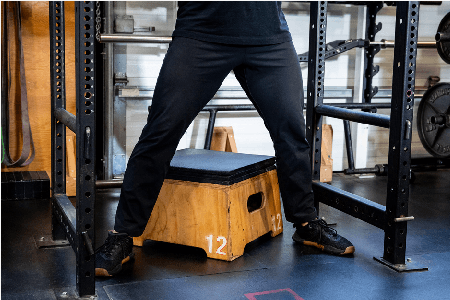
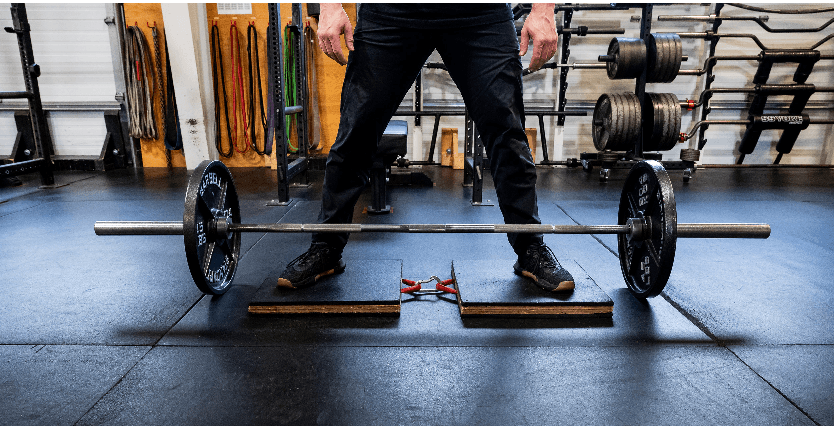
Elevate Feet for Bench Press
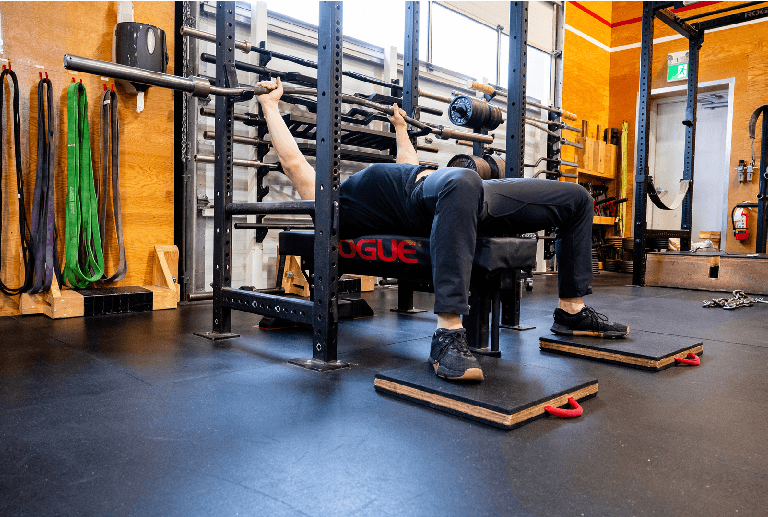
2” Blocks Deadlift
2” Deficit Conventional Deadlift
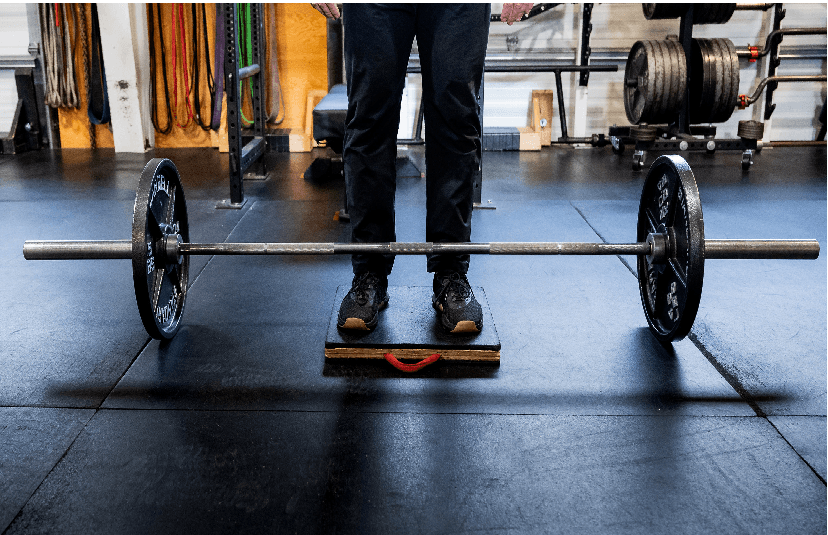
2” Deficit Sumo Deadlift
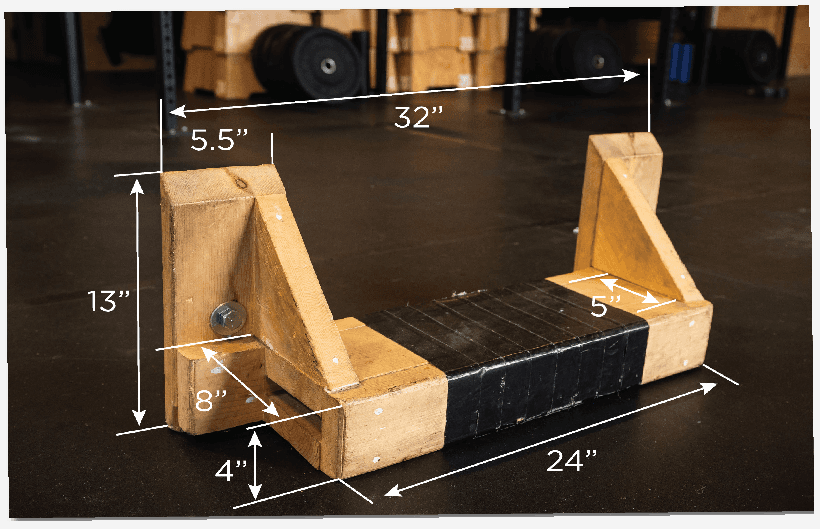
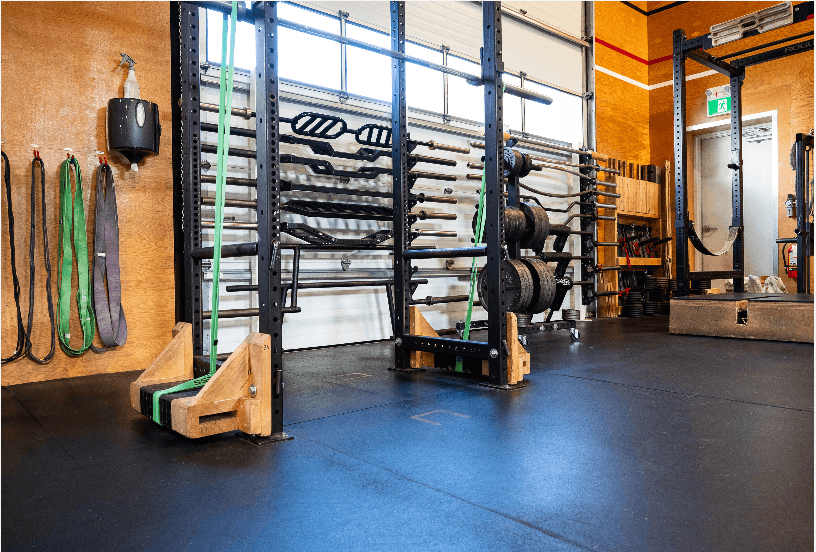
Squamish Blocks
Squamish blocks were designed to be added to a power rack and give the exact band tension and feel as the original monolift at Westside barbell. This is a simple and solid way to apply any band(s) to a bar for squats.
Note that these dimensions are for a Rogue R3 rack and will need to be adjusted for length if you’re using a different rack.
How to Build Squamish Blocks
Directions
- From each of the two 2x6x8’ cut: 2x24”, 1x32”, and 1x13” *45° angle on one end. If you cut them in this order you can finish with the 45° angle cut.
- From the 2x6x10’ cut: 2x24”, 2x13” *45° angle on 1 end. The remainder will be used later to cut the angle brackets. If you cut a 45° angle onto the first 13” length you can flip the next piece, measure 13” from that long side of the 45° angle and then straight cut the next length. This will save you a little material.
- Using a table saw, rip four of the 24” lengths to 5”.
- Using a table saw, rip two of the 24” lengths to 4”.
- Using a table saw, rip the two 32” lengths to 4”.
- All that’s left to cut now are the angle brackets. A carpenter’s square makes this task easier. Note the grain lines in the photo as this will make these the strongest. The long side of each triangle is 11” the other two sides are 7.5”.
- Using 3” GRK screws and glue attach the 4”x24” length to the sides of both 5”x24” lengths. (note the gap between the 5” lengths in the photo).
- Measure 4” from each end of the 4x32” length and mark it.
- Using the marks, attach the 4”x32” length to the other sides of the 2 5”x24” lengths with glue and 3” GRK screws.
- Using glue and the 2.5” GRK screws attach the two 13” uprights (vertically) to the 4”x32” length. Make sure the angle is on the top side and facing the right direction (see photo).
- Using glue and 2.5” GRK screws attach the angled brackets (as shown in the photo).
- Sand all sides and edges. If you’ve got a router with a ¼” roundover bit it would be awesome to use it on all the edges the band will travel over.
- Position the blocks in place on the rack you will use them on and clamp the blocks to the rack.
- While in place using the holes on the rack and a drill with a ⅝” bit drill the holes through the blocks where the bolts will go.
- Using the Gorilla tape cover the broad area where the bands will go.
- Optionally you can fill your screw holes with wood filler and finish with 3 coats of varathane.
Note: 2x6 actually measures 1x5”x5.5”
How to Build Squamish Blocks (continued)
Tools
- Tape measure.
- Carpenters square.
- Pencil.
- Circular saw.
- Table saw.
- Drill with ⅝” bit.
- Impact driver or drill + bit for GRK screws.
- 180 grit sandpaper and block or palm sander (a router with a ¼” roundover bit would also be great).
- Clamps.
Materials, Cutting List, Layout (per set)
Materials:
- 2x 2x6x8’.
- 1x 2x6x10’.
- 4x 5/8” bolts (2x3 - 4.5” rig) (3x3 rig - 5.5” long).
- 2x 5/8” nuts.
- 4x 5/8” washers.
- 2.5” and 3” GRK screws.
- Gorilla tape.
- Carpenters glue.
Cutting list:
- 4x 5.5”x13” *45° angle on 1 end.
- 2x 4”x32”.
- 2x 4”x24”.
- 4x 5”x24”.
- 4x 7.5”x7.5” *angle brace (note the direction of the grain).
Layout:
From each 2x6x8’:
- 1x 4”x24”.
- 1x 5”x24”.
- 1x 4”x32”.
- 1x 5.5”x13”.
From the 2x6x10’:
- 2x 5”x24”.
- 2x 5.5”x13”.
- 2x angled braces.
Before you buy materials: The cutting list on this is tight, leaving only inches to spare. To be successful you’ll need clean straight wood and to make no mistakes. If mistakes feel possible or likely then it might be a better idea to buy 4x 2x6x8’ so you’ve got a little extra material.
Master Band Tension Sheet - Deadlifts
These measurements were done using a calibrated scale, with out of the package Rogue bands, and a 5’10” (178cm) athlete. Heights of the bar have been noted under the charts. It’s important to reiterate that many factors will effect these tensions. This includes but is not limited to: how they’re set up, height or bone segment length of the athlete, the bar they’re being used on, box or bench height, manufacturer, age, or number of uses. It’s also worth a reminder that they do not have to be 100% exact to be effectively used. Start with these numbers and if down the road you want to get very specific then set aside a afternoon with a full set of new bands, an excellent scale, and a helper or two.
DEADLIFT
Rogue Infinity Rig
- #0: top 27.5, bottom 5, difference 22.5.
- #1: top 60, bottom 15, difference 45.
- #2: top 85, bottom 25, difference 60.
- #3: top 140, bottom 40, difference 100.
- #4: top 225, bottom 67.5, difference 157.5.
Pins, lowest hole on posts: 59.5" on center. Bar heights, floor to bottom of barbell: top 30", bottom 8.25".
Rogue R3 Rack
- #0: top 120, bottom 40, difference 80.
- #1: top 250, bottom 80, difference 170.
- #2: top 330, bottom 95, difference 235.
Pins, lowest hole on posts: 27" on center. Bar heights, floor to bottom of barbell: top 30", bottom 8.25".
6 Pin Rack Pull (Rogue R3 rack)
- #0: top 120, bottom 50, difference 70.
- #1: top 250, bottom 100, difference 150.
- #2: top 330, bottom 140, difference 190.
Bar heights, floor to bottom of barbell: top 30", bottom 13.75".
6 Pin Rack Pull with Figure 8 Bands (Rogue R3 rack)
- #0: top 105, bottom 30, difference 75.
- #1: top 225, bottom 45, difference 180.
- #2: top 285, bottom 60, difference 225.
- #3: top 520, bottom 105, difference 415.
Bar heights, floor to bottom of barbell: top 30", bottom 13.75".
Master Band Tension Sheet - Squats
Back Squat Band Tension
Monolift and SQB blocks
- #0: top 25, bottom 12.5, difference 12.5.
- #1: top 50, bottom 27.5, difference 22.5.
- #2: top 65, bottom 35, difference 30.
- #3: top 105, bottom 57.5, difference 47.5.
- #4: top 175, bottom 92.5, difference 82.5.
- #5: top 255, bottom 135, difference 120.
Bar heights, floor to bottom of barbell: top 58.5", bottom 39.5".
Spotter Arms (upside down)
- #0: top 25, bottom 12.5, difference 12.5.
- #1: top 50, bottom 25, difference 25.
- #2: top 65, bottom 30, difference 35.
- #3: top 105, bottom 55, difference 50.
- #4: top 175, bottom 80, difference 95.
Arms as low as possible on an infinity rig. Rig pin, floor to center of hole: 47.5".
Dumbbells
- #0: top 20, bottom 7.5, difference 12.5.
- #1: top 40, bottom 15, difference 25.
- #2: top 52.5, bottom 20, difference 32.5.
- #3: top 90, bottom 40, difference 50.
- #4: top 150, bottom 67.5, difference 82.5.
Dumbbells used: 90s and 100s.
16" Rogue Camber Bar Back Squat (plate variant)
- #0: top 20, bottom 7.5, difference 12.5.
- #1: top 45, bottom 17.5, difference 27.5.
- #2: top 60, bottom 20, difference 40.
- #3: top 100, bottom 40, difference 60.
- #4: top 185, bottom 72.5, difference 102.5.
Monolift or SQB blocks with bands looped over the plates.
Master Band Tension Sheet - Bench Press
Bench Press Band Tension
2 pins (Rogue R3 rack)
- #0: top 37.5, bottom 17.5, difference 20.
- #1: top 80, bottom 40, difference 40.
- #2: top 105, bottom 50, difference 55.
Pins set up: 6" on center with a 2 hole gap.
Single Dumbbell
- #0: top 37.5, bottom 20, difference 17.5.
- #1: top 80, bottom 45, difference 35.
- #2: top 105, bottom 50, difference 55.
Dumbbells used: 55 (#0 and #1), 105 (#2).
Future press (Rogue R3 rack)
- #0: top -12.5, bottom -17.5, difference 5.
- #1: top -25, bottom -40, difference 15.
- #2: top -35, bottom -50, difference 15.
- #3: top -60, bottom -85, difference 25.
- #4: top -100, bottom -142.5, difference 42.5.
Bands girth hitched to the top crossmember of the R3 rig. Bottom of crossmember to floor: 86".

Mac McAdams
Legend
Legend Entries
- 1RM: 1 repetition max. As heavy as you can go for a single rep.
- RM: Repetition max. As many reps as you can perform in a single set.
- 12x2: 12 sets of 2 reps. Weight is the same for all sets.
- 8-8-8-8: 4 sets of 8 reps. Weight increases each set.
- 8-3x8: 4 sets of 8 reps. Weight increase between sets 1 and 2 then stays the same for sets 2 through 4.
- 3@75%-3-3: 3 sets of 3 reps. First set is at 75% of a 1RM. Sets 2 and 3 are increasing in weight.
- OT30sec.: Lift on the 30 seconds. Each set is started every 30 seconds until all sets are completed.
- OT2:15: Lift on the 2 minutes and 15 seconds. Each set is started every 2 minutes and 15 seconds until all sets are completed.
- #1: Number 1 band.
- 300#: 300 pounds.
- 300+#2: 300 pounds on the bar (including the weight of the bar) plus number 2 bands.
- 300+75# chain: 300 pounds on the bar (including the weight of the bar) plus 75 pounds of chain.
Bench press grip widths
- Narrow grip: index fingers on the inside edge of the knurling.
- Middle grip: hands centered between the inside edge of the knurling and the power ring.
- Wide grip: pinky on the power ring.
General notes
All weights in this book are in pounds unless indicated otherwise.
Meet the Authors
Jesse Bifano
With over 25 years of athletic competition and full-time coaching experience since 2009, Jesse brings a wealth of expertise to the world of strength and conditioning. A former member of Rapattack, an elite wildland firefighting team specializing in helicopter rappel and hoist operations, Jesse has pursued diverse athletic challenges, including combatives, mountain bike racing, ultra-distance events, climbing, logger sports, strongman, and powerlifting.
Since discovering CrossFit in 2007, Jesse has traveled the globe helping his athletes compete at the highest level. As the owner of Squamish Barbell in Squamish, BC, he has programmed consistently for both CrossFit and lifting since opening in 2009. He’s been implementing the Conjugate system for all athletes since 2010, coaching youth and adult programs, private sessions, and professional athletes in sports such as MMA, BMX, hockey, freestyle skiing, ultra-distance running, and mountain sports. Jesse continues to share his expertise through the Conjugate Nation podcast, inspiring athletes and coaches worldwide.

Chris McDonald
Chris McDonald is a strength and conditioning coach with over two decades of experience helping athletes. Currently coaching at CrossFit Fort Vancouver in Vancouver, WA, Chris has been instrumental in guiding athletes of all kinds, including CrossFit competitors, and high school and collegiate sport athletes.
Chris began his coaching journey in 2004 and spent 14 years as the owner of a successful CrossFit affiliate in Portland, OR. His commitment to the development of athletes extends to teaching CrossFit Level 1 and Level 2 Seminars and designing the Coaching Fundamentals Course for CrossFit, showcasing his dedication to educating the next generation of coaches.
A lifelong learner, Chris holds a Bachelor of Science in Biology (2002) and a Master of Science in Exercise Science (2007). His professional credentials include Certified Level 4 CrossFit Trainer (2008), Certified Strength and Conditioning Specialist (CSCS, 2006), and multiple certifications from the National Academy of Sports Medicine (NASM,
Special Thanks
Thank you to all of our mentors and athletes who have made this book relevant and possible.
Photos:
Kat Siepmann
Karen Jakobsen
Reid F. Holcomb